 Adobe InDesign has lots of fantastic tips & tricks, but it’s not always easy to find them. Here are three hard-to-find but super helpful features that will save you lots of time (and impress your co-workers at the same time!)
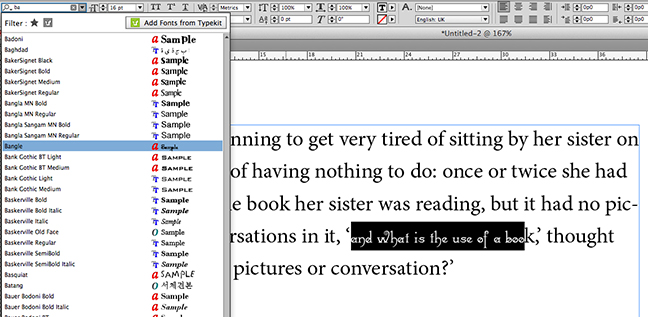
 The Font Selector. Unless you’re really familiar with all your fonts, it can often take forever to find one you like when you’re designing a page. Wouldn’t it be great if you could preview fonts for selected text without a lot of clicking and undos? Now you can — with InDesign CC’s new Font Selector feature.
1. Highlight some text on the page, then click on the font popup menu in the Control Panel (this doesn’t work with the Type Menu).
2. Hover your mouse over a font and press the Command or Option key (Mac) or the Control or Alt key (PC) to display the selected text in that font. To try other fonts, release the key and press the up arrow key or down arrow key to scroll through the list.
3. Once you find one a font you like, click the font to select it (or press Return or Enter.) Or, if you click back on the page without selecting a font (or press Esc,) your text will remain unchanged.
Such a great timesaver!
 Here’s how it works:
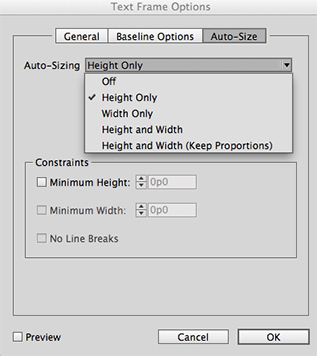
1. Select a text frame, then choose Object Menu> Text Frame Options. Then click the “Auto-Size” tab.
2. From the Auto-Sizing popup menu, choose how you want the frame to automatically resize (height only, width only or both). Set a minimum width or height if desired and then choose OK.
3. Start editing text in the text frame and watch it resize automatically as text is added or deleted!
TIP: If you’d like all the text frames in your layout to automatically resize like this, double-click the “Basic Text Frame” in the Object Styles Panel and set the “Text Frame Auto Size Options.”
 Here’s how it works:
1. Open a document and select the text that contains the URLs you’d like to convert (or select no text to convert all the hyperlinks in the document.)
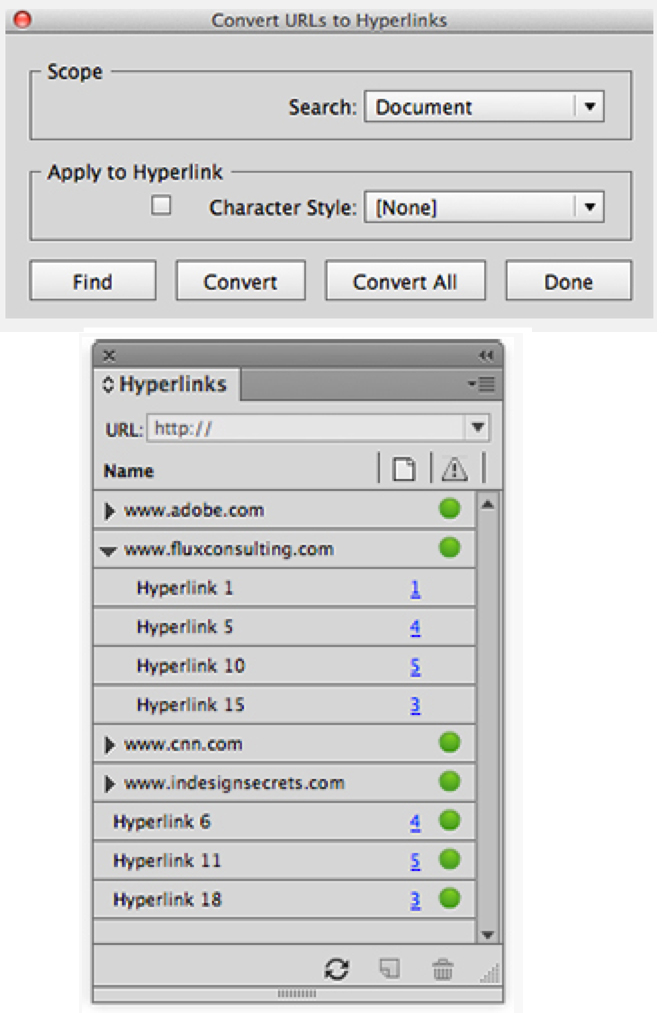
2. Open the Hyperlinks Panel (Window> Interactive> Hyperlinks) and click the popup menu in the upper right-hand corner. Choose “Convert URLs to Hyperlinks” and the dialog box above right will appear.
3. Choose the scope of your conversion: Document, Story or Selection (“Story” means the text frame/threaded frames your cursor is currently in.) Then either find and convert the URLs one by one or simply click “Convert All” to convert every URL into a hyperlink.
4. Once it’s finished, you’ll see all the hyperlinks listed in the Hyperlink Panel (see image at right.) So fast!!
For more helpful InDesign tips, check out our InDesign Tips & Tricks page!